Sauerkraut & Pork

This is one of those recipes.

There are certain family recipes that, by the mere smell of them cooking, bring back fond family memories. For me, and I suspect for most, they are the kinds of hearty meals that you eagerly anticipate all day. They evoke thoughts of certain seasons, holidays, or just great times with family and friends. This is just such a recipe.

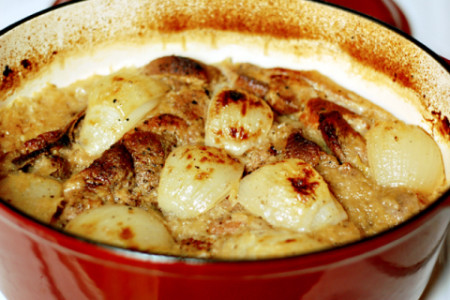
There is something magical that happens in that dutch oven. The whole house fills with an incredible aroma that immediately makes me think of my childhood with my maternal grandparents. And now that I have my own family I am passing the love down the line.

Sauerkraut and pork isn’t at all sexy, but what it lacks in fancy schmancy ingredients and visual appeal it more than makes up for in flavor and pure comfort food bliss. It’s simply pork shoulder that is braised in sauerkraut, applesauce and onions. That’s it! It’s simple rustic peasant food that couldn’t really be simpler or better.

Alright, that’s enough back-story, let’s make some magic.
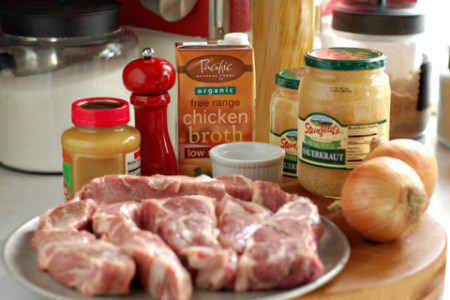
Ingredients
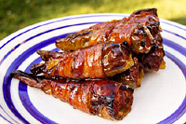
4 lbs Country-style pork ribs, bone-in
2 Tbsp Canola oil
3 cups Applesauce, no sugar added
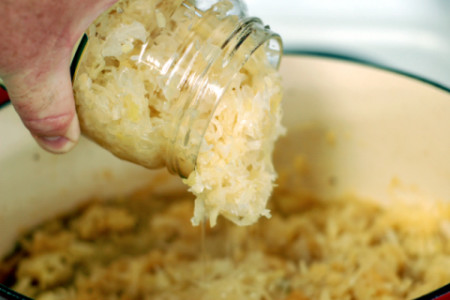
2 jars Sauerkraut, 32 oz each
2 Medium yellow onions
Chicken broth, as needed
Kosher salt
Pepper

Sauerkraut & Pork

Method
Preheat your oven to 325 degrees.

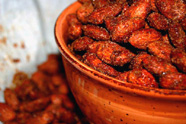
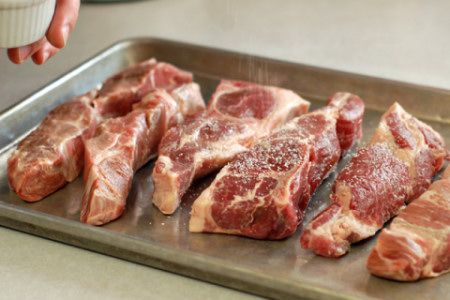
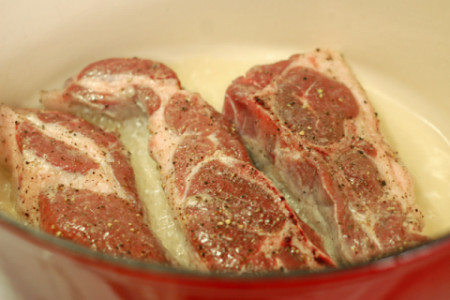
Season the pork with salt. You don’t need too much because there’s plenty in the kraut.

Sauerkraut & Pork

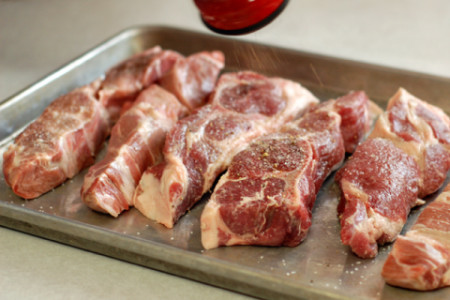
...then liberally with fresh ground coarse black pepper.

Sauerkraut & Pork

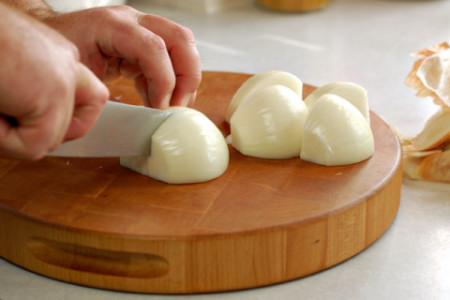
Peel and quarter the onions.

Sauerkraut & Pork

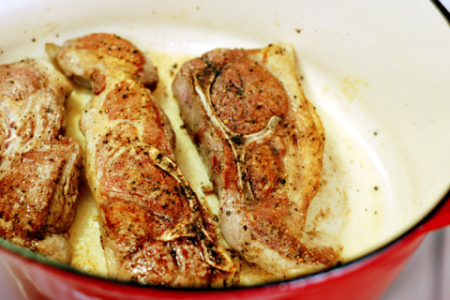
Heat your dutch oven over medium-high heat, add and heat the oil, then add two or three of the pork pieces. You don’t want to crowd the pan, so work in batches.

Sauerkraut & Pork

Cook the pork until it is nicely browned on one side, about two minutes. Flip them over and cook another two minutes, or until the other side is nicely seared. Repeat the searing for the remaining pork.

Sauerkraut & Pork

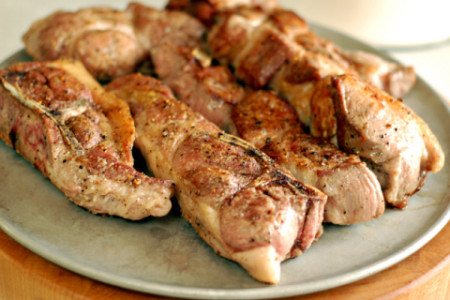
Turn off the heat, remove the pork to a plate, and set aside.

Sauerkraut & Pork

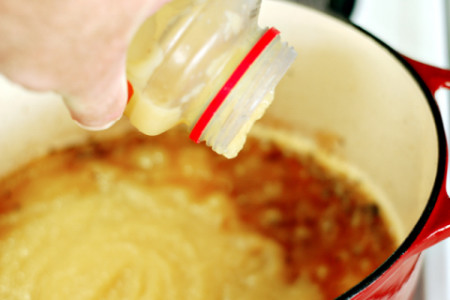
Add the applesauce to the pan and stir to deglaze it.

Sauerkraut & Pork

Drain about half of the juice from the sauerkraut. Add the kraut to the pan and stir to incorporate it with the applesauce.

Sauerkraut & Pork

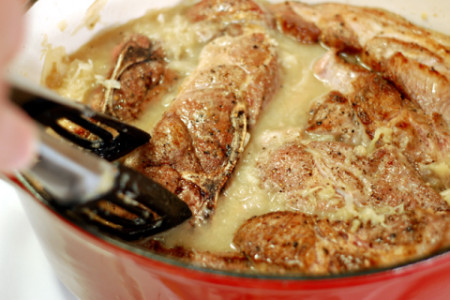
Arrange the pork on top of the sauerkraut and applesauce mixture. It’s okay to sort of cram them in there if need be, but try to keep them from being completely submerged.

Sauerkraut & Pork

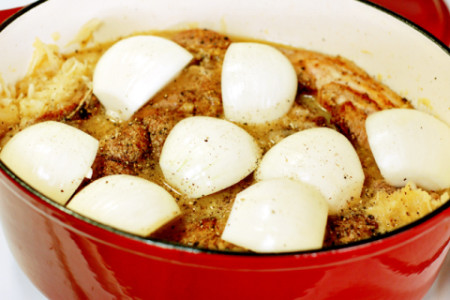
Arrange the onions on top of the pork.

Sauerkraut & Pork

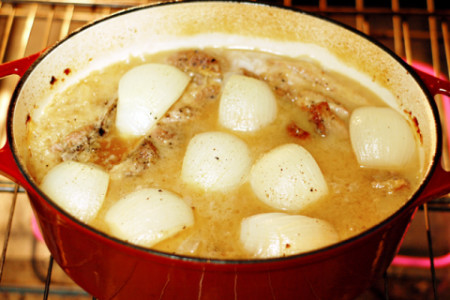
Cover and bake at 325 degrees for an hour and a half.

Sauerkraut & Pork

Check the liquid content and add chicken stock if the top looks at all like it’s starting to get dry. You want to see the sauerkraut just barely under the surface of the liquid.

Cover and continue cooking another hour.

This is where the magic really starts to happen. Soon everyone in the house will be asking when dinner will be ready.

Sauerkraut & Pork

Uncover and cook another 30 minutes.

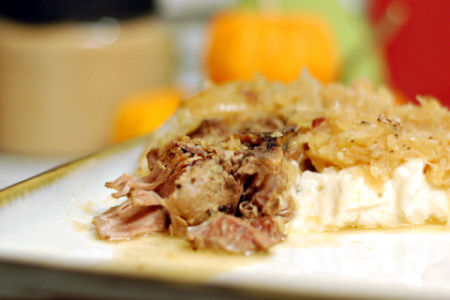
You can use this time to make your favorite plain mashed potatoes.

Another option is to add chicken broth and make dumplings right on top. My grandmother would usually make both, as my sister was a fool for the dumplings.

Sauerkraut & Pork

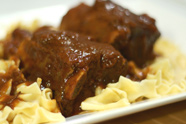
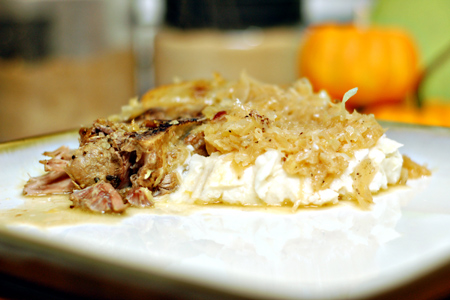
Put a pile of mashed potatoes on a plate, make a well in it, ladle on a bunch of kraut and juice, and top with some of the tender pork and a wedge of onion.

Dive in!

Sauerkraut & Pork

I am greatly humbled and honored to have had this recipe featured today on the Tasty Kitchen blog. As I mentioned in February, if you appreciate great recipes from passionate cooks, head on over, become a member (free), and thank me later.

Labels: ,


Fried Catfish Sandwish

Tonight I had a serious hankerin' for a fish sandwich. So, I remedied the situation by frying up about a 10-inch catfish fillet and laid it on a toasted roll with some Creole tartar sauce that I whipped up.

Here you have a serious man-sized fishwich!

Ingredients
1 lb Catfish fillet
1 pkg Lousiana-brand New Orleans Style Fish Fry with Lemon
1 loaf Good Italian bread
1/4 cup Creole tartar sauce (recipe below)
Oil for frying (I used peanut oil)

Creole Tartar Sauce
1/2 cup Mayonnaise
3 Tbsp Sweet pickle relish
1 Tbsp Cocktail sauce
1 tsp Lemon juice
1 tsp Creole seasoning
1 tsp Tabasco

Method
Combine all of the tartar sauce ingredients in a small bowl, mix well and refrigerate.

In a large heavy pan or fryer heat the oil to 350º. You'll obviously need enough to completely submerge the fish.

Prepare the fish per the fry mix package instructions.

Turn on your broiler.

Fry the fish until it is golden brown and crispy, about three to five minutes depending on the thickness.

Cut an split a piece of the bread large enough to just hold the fish.

Toast the roll halves under the broiler.

Drain the fish on paper towels.

Schmear a good amount of tartar sauce on each roll half and add the fish.

Enjoy!

Labels: , , ,


Italian Beef

This past weekend I finally got around to making Italian beef on the grill. It's something that I've long thought about trying, but never seemed to get to.

Italian beef is an institution in the Chicago area. Here is how it's described at Wikipedia:
An Italian beef is a sandwich of thin slices of seasoned roast beef, dripping with meat juices, on a dense, long Italian-style roll, believed to have originated in Chicago, where its history dates back at least to the 1930s. The bread itself is often dipped (or double-dipped) into the juices the meat is cooked in, and the sandwich is typically topped off with Chicago-style giardiniera (called "hot") or sauteed, green Italian sweet peppers (called "sweet").
Since this was my first time trying this the recipe is a work-in-progress. I used eye of round marinated overnight in a concoction that I felt worked well. The next time I try this I think I'll hit the roast with a Jaccard to help the marinade penetrate more.

Let's get our eye-talian on!

Ingredients
3 lb Eye of round
2 cups Water
1 Tbsp Beef base (I prefer Better Than Boullion)
Hearty Italian rolls
Your favorite giardiniera (I used Mezzetta)

Marinade
1/4 cup Water
1/4 cup Red wine vinegar
1/4 cup Canola oil
1 Tbsp Dry Italian seasoning
1 Tbsp Sugar
2 tsp Garlic salt
1 tsp Black pepper
1 tsp Tabasco sauce

Method
Trim any silverskin from the the roast.

Combine all of the marinade ingredients in a one-gallon zip-top bag, seal and shake well.

Add the roast to the bag and seal, removing as much excess air as possible.

Refrigerate at least eight hours, or preferably overnight.

Remove the roast from the marinade and let sit, covered at room temperature, for about 90 minutes.

Italian Beef

Start your grill and prepare for indirect cooking over a medium fire (325-350º). I used oak lump charcoal.

Cook the roast indirect until it reaches 135-140º, approximately two hours.

Italian Beef

Pour the marinade from the bag into a medium saucepan and bring to a gentle boil over medium heat. Let boil for five minutes, stirring occasionally.

Note: The pan has to be large enough to hold the roast flat on the bottom.

Add the water and beef base to the pan, reduce the heat, and simmer one minute.

Remove the pan from the heat, cover and set aside.

When the roast is done (135-140º internal), remove it from the grill and add it to the pan. Cover and let rest 30 minutes.

Italian Beef

Slice the beef very thin across the grain.

Warm your rolls in the oven.

Italian Beef

Pile some beef on a roll, drizzle the meat and roll with the au jus, and top with some giardiniera (I chopped mine a little).

Italian Beef

Enjoy!

What does a guy do with the leftovers? He makes an Italian beef pizza.

Italian Beef Pizza

Labels: , ,


The Mini-Grill

I often refer to our youngest daughter, Chloe, as "mini-me". She kinda looks like me (poor girl), has my mischievous personality (another strike), and shares my affinity for making things. In fact, when asked, she will emphatically tell you that she wants to be a carpenter when she grows up. Her maternal grandfather is a retired construction superintendent, so that one ain't on me.

A few weeks ago Chloe came to me with this tiny little covered tin and asked if we could make a grill out of it. Ironically, earlier that very week I had run across this in my daily RSS reading.

The tin she showed me was maybe two inches in diameter. She was sure that it would be a cool little grill, but my pragmatic mind begged to differ. I thought something a little larger, but still "mini" was clearly in order here. As much as I tried to sell Chloe on the idea, she thought her tin was all that, and a side salad. This obviously called for a mission.

I scoured our area for something bigger, but not too big. It seemed that I would be denied, until I wandered into the local Tuesday Morning store. There I found these perfect little stainless steel bowls. They are about six inches in diameter and about three inches deep. They were clearly perfect for "The Mini-Grill".

The next order of bidness was to find some legs, grate material, and the necessary hardware. Home Depot was on the way home from Tuesday Morning, so in I went. I picked up some six-inch carriage bolts, washers, nuts, and expanded metal.

Our eldest two girls were out of town at Girl Scout camp that weekend, so Chloe and I built this bad boy in our own time. We measured, cut circles of cardboard for templates, measured some more, and then it was time for the fireworks.

I donned my protective glasses and ear muffs, plugged in the angle grinder (at dusk, of course), clamped the expanded metal in the Workmate, and let 'er rip. When the sparks settled, we had expanded metal charcoal and cooking grates.

After sanding the rough edges from the grates it was time to punch some holes and assemble this bad boy. We measured and marked some more, then drilled, then drilled some more. Finally, we put it all together. There was much rejoicing. Chloe was basking in the glow of "The Mini-Grill", and her sisters were nowhere to be seen.

We have yet to fire up "The Mini-Grill", but somehow that's secondary now. It was a great daddy/daughter project.

Stay tuned for the maiden cook.

Chipotle Lime Steak

Here is an easy recipe for a great south-of-the-border steak. It combines the smoky goodness of chipotle with fresh lime juice, salt, garlic, and a couple other ingredients to make a killer maridade. You can eat the steak straight-up, or use it for fajitas, as I did.

Ingredients
1 Flat iron (chuck top blade), flank or skirt steak, about 1 1/3 pounds
1 Tbsp Tabasco® chipotle sauce
1 Tbsp Garlic, minced (about 3 cloves)
2 tsp Worcestershire sauce
1 tsp Chili powder
1 tsp Black pepper
Juice of one lime
Canola oil

Method
Combine all of the ingredients except the oil in a gallon zip-top bag and seal, removing all of the excess air.

Slosh the bag, and massage it with your hands to get all of the ingredients combined.

Refrigerate for at least two hours, and up to four hours.

Start your grill and prepare for direct grilling over medium-high heat (400-450º).

Remove the steak from the bag and pat each side dry with paper towels.

Oil each side of the steak lightly with canola oil.

Note: These cooking times are approximate, and they based on a steak that is about 3/4" thick. Your mileage may vary.

Grill the steak until it readily releases from the grate, about three minutes.

Rotate the steak 45º and continue cooking for about two minutes.

Chipotle Lime Steak

Flip the steak over and grill three minutes more.

Chipotle Lime Steak

Rotate the steak 45º and continue cooking for about one more minutes.

Remove the steak to a platter and let rest ten minutes.

Chipotle Lime Steak

Slice across the grain into 1/4" slices.

Chipotle Lime Steak

Serve and enjoy!

Labels: ,

<< Older Posts

Newer Posts >>


Popular Recipes
All-Purpose BBQ Seasoning Braised Nectarines with Champagne Honey Caramel Classic BBQ Chicken Drumsticks Cuban Rueben Grilled Chicken Cordon Bleu Homemade Hot Sauce Hungarian Braised Short Ribs The M.O.A.B. Pulled Pork Pockets Rattlesnake Tails Slammin' Salmon Sweet-n-Sassy BBQ Almonds View all of my recipes
 
Other Popular Posts
Competition BBQ 101 Review: Original vs Competition Kingsford® Charcoal Review: Kingsford® Competition Briquetes Discovery: Kiwi Knives Discovery: Quality Inexpensive Injector Book Review: Serious Barbecue