Let us all remember the real reason for the celebration and praise of this Christmas season.


I wish you all a very merry and blessed Christmas.

John

Mushroom-Ranch Pinwheels (via patiodaddiobbq.com)

I've recently partnered with the great folks at Hidden Valley®, and I'm very happy to bring you some tasty ranch-inspired goodies. First up is a light but savory appetizer that is perfect for your holiday celebration.

Let's face it, the holidays mean that we'll all likely be eating more than our fair share of good food. All great meals, get-togethers and parties start with family, friends, and plenty of finger foods. Here's an easy crowd-pleasing appetizer that will impress your guests without filling them up.

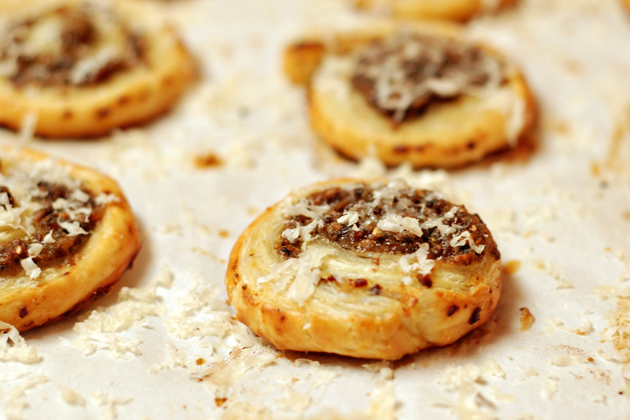
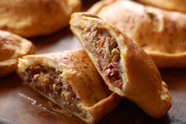
These pinwheels are very simple, but your guests will think that you spent a ton of time making them. They combine the savory goodness of sauteed mushrooms with just a touch of that familiar ranch flavor in light and flaky puff pastry.

Ingredients
1 sheet (10" X 15") Frozen puff pastry, thawed
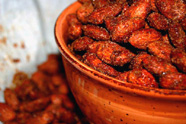
3 cups Finely chopped crimini mushrooms (about 2/3 pound)
1 envelope (1 oz) Hidden Valley® Salad Dressing and Seasoning Mix
2 Tbsp Minced shallot
2 Tbsp Butter, unsalted
2 Tbsp Extra virgin olive oil
1 tsp Minced garlic
1/4 tsp Black pepper, ground fresh
1 egg
1 Tbsp Cold water
1/4 cup Shaved Parmesan cheese

Method
Heat a large saute pan over medium-high heat. Add the butter and heat just until it starts to foam, then add the olive oil and heat 30 seconds more.

Add the shallot to the pan and cook one minute. Add the mushrooms and garlic and cook until the mushrooms are tender, about 10 minutes.

Remove the pan from the heat and add the ranch mix and pepper. Set aside and let the mixture cool 15 minutes.

Note: You can make the mushroom mixture the day before. Refrigerate it and let it come to room temperature just before you are ready to use it.

Preheat your oven per the puff pastry package instructions, typically 400º.

Unfold the thawed puff pastry according to the package instructions. Spread an even layer of the mushroom mixture to about 1/8" thick across the entire puff pastry sheet, leaving about 1/2" margin around the edges.

Whisk together the egg and water in a small bowl and brush the edges of the pastry, reserving the remaining egg mixture.

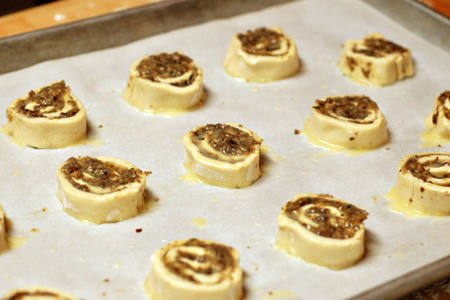
Gently roll the pastry in a jelly roll fashion. Cut the roll into 1/2" slices and place them 1 1/2" apart on a baking sheet lined with parchment paper.

Brush the top and edges of each pinwheel with the egg mixture.

Mushroom-Ranch Pinwheels (via patiodaddiobbq.com)

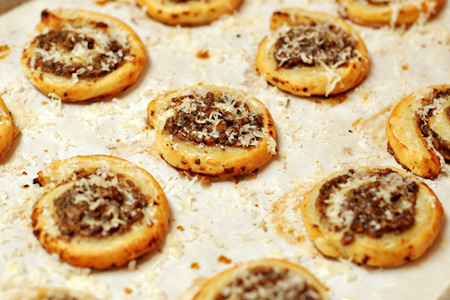
Bake the pinwheels until they are golden brown, about 15-20 minutes.

Remove the pan from the oven and let cool about 10 minutes, then sprinkle the top of each pinwheel with the cheese.
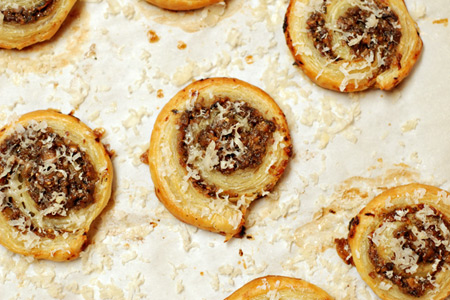
Mushroom-Ranch Pinwheels (via patiodaddiobbq.com)

Mushroom-Ranch Pinwheels (via patiodaddiobbq.com)

Serve and enjoy!

Makes 14-15 pinwheels

Note: If you have leftover mushroom filling, just mix it with some soft unsalted butter to make an outstanding compound butter to top a steak, baked potato, or to add a new dimension to garlic bread. It will keep in the refrigerator for at least a week.

Disclaimer: I'm a compensated partner of Hidden Valley®.

Labels: , ,


News (Sort Of) You Can Use: The Mini Blender

This discovery is bittersweet. Have you ever had one of those moments when you think you've discovered something truly unique? You know, one of those instances when you look at your discovery and think, "Wow! This is... I've got to go tell people about this immediately!" No? Am I the only one? Well, here's my latest ego-crushing reality-two-by-four-to-the-face moment.

Based on the picture above I think you can see where this is headed. There I was, leaning against the kitchen counter, minding my own business, when I spied some things on the same counter that *gasp* my daughters were supposed to have put away. I saw the blender base and a nearby canning jar. Being keenly in touch with the MacGyver side of my personality, I looked at them and, with an almost Terminator-like scan, I thought, "Oh yeah, those two things were clearly made for each other!"

With great expectation I grabbed the jar and quickly mated it to the blender base. As I screwed them together I was already thinking about the possibilities of my discovery. I could make personal milkshakes (more on that later), small batches of marinades or sauces, homemade mayonnaise, salad dressings, the list was almost endless.

News (Sort Of) You Can Use: The Mini Blender

Eager to share what was sure to be an earth-shattering culinary discovery, I showed our youngest daughter, Chloe. She was amazed, as she should have been. The moment that I mentioned the possibility of personalized milkshakes, with a built-in serving glass, her eyes lit up and I could tell that she got it. Within moments she had me convinced that we must make milkshakes immediately to test this new-found awesomeness.

Sandi was out and about with the older two girls, so I called her and asked her to get some ice cream sandwiches on the way home. She did, and the three girls enjoyed ice cream sandwich shakes. It worked flawlessly.

Today, as I was thinking about how cool this post would be, I did something that would quickly bring me a strong dose of reality. I Googled "blender mason jar" (without the quotes). I was shocked when I found that apparently everyone but me knew that small mouth canning jars fit the average household blender base.

Although my ego was bruised, I held out some hope that some of you, my beloved readers, would find this discovery to be as exciting as I initially did.

You're welcome.

Note: The milkshake idea was inspired by an online interview with Guy "The Human Lava Lamp" Fieri where he described some dude doing apple pie shakes by dumping a whole pie, crust and all, in a blender with ice cream. I made mine with just a standard cheapo ice cream sandwich and a little whipping cream and whole milk. Chloe said, "This is the best shake that I've ever had."

Labels:


Sweet Spicy & Sticky Asian Ribs (via patiodaddiobbq.com)

I had a hankerin' for some ribs last weekend, but I wanted something a little off the beaten path. Included in my craving was the yearning for something sweet and spicy. This recipe is the result of some early morning category-one brainstorming.

A few ideas rattled around in my brain and I eventually decided to use my Finger Stickin' Chicken Sauce as the base to which I'd add an Asian flair. The chicken sauce certainly has the sweet and spicy nailed, so I simply added some hoisin sauce to add the Asian persuasion, and a little Sriracha to kick the heat up a little bit.

Note: If you have a favorite method for smoking/grilling your baby back ribs, use that with this rub and sauce. There's no need to cook the ribs the way I did. Also, you can certainly roast the ribs in an oven, but you may have to adjust the cook time.

Ingredients
3 slabs Loinback/babyback pork ribs, membrane removed (2 1/2 to 3 lbs each)
1 batch Rub (recipe follows)
1 batch Glaze (recipe follows)
Toasted sesame seeds, for garnish (optional)
Green onion, sliced thin, for garnish (optional)

Rub
2 Tbsp Sea salt
2 Tbsp Light brown sugar
2 tsp Chinese five spice (I use McCormick's Gourmet)
2 tsp Black pepper, ground fresh
1 tsp Ground ginger

Glaze
1 batch Finger Stickin' Chicken Sauce
1/2 cup Hoisin sauce
1 Tbsp Sriracha (more or less to taste)

Method
About 4 hours before you want to serve, start your smoker or grill and prepare for indirect cooking over a medium fire (275-300º). I cooked over straight Kingsford Original briquets with no smoke wood.

Combine the rub ingredients in a small mixing bowl and whisk well until all of the ingredients are combined. Season both sides of each slab of ribs evenly with the rub. I put more on the meat side than the bone side.

Note: You can season the ribs ahead of time, but no more than an hour before you're ready to start cooking.

Smoke/grill the ribs indirect until a toothpick inserted between the bones has very little resistance. The cook time is approximately 3 hours at an average temperature of 300º. However, every hog and cooker is different, so use the timing as merely a guideline. The toothpick test is your friend.

While the ribs are cooking, make the glaze. Follow the instructions for the Finger Stickin' Chicken Sauce then whisk in the remaining ingredients at the end. Remove from the heat and set aside.

Remove the ribs from the cooker and coat both sides of each slab with a light coating of the glaze. Return the ribs to the grill/smoker and cook indirect another 10 minutes. Pay close attention because the glaze will burn easily. You just want it to caramelize slightly.

Sweet Spicy & Sticky Asian Ribs (via patiodaddiobbq.com)

Sweet Spicy & Sticky Asian Ribs (via patiodaddiobbq.com)

Remove the ribs from the cooker and coat both sides of each slab with a generous coating of the glaze.

Cut the ribs between the bones, then plate and sprinkle with sesame seeds and sliced green onion for garnish.

Sweet Spicy & Sticky Asian Ribs (via patiodaddiobbq.com)

Serve and enjoy!

Note: I cooked the ribs in my Pit Barrel Cooker.

Labels: ,

<< Older Posts

Newer Posts >>


Popular Recipes
All-Purpose BBQ Seasoning Braised Nectarines with Champagne Honey Caramel Classic BBQ Chicken Drumsticks Cuban Rueben Grilled Chicken Cordon Bleu Homemade Hot Sauce Hungarian Braised Short Ribs The M.O.A.B. Pulled Pork Pockets Rattlesnake Tails Slammin' Salmon Sweet-n-Sassy BBQ Almonds View all of my recipes
 
Other Popular Posts
Competition BBQ 101 Review: Original vs Competition Kingsford® Charcoal Review: Kingsford® Competition Briquetes Discovery: Kiwi Knives Discovery: Quality Inexpensive Injector Book Review: Serious Barbecue