How To: Smoke On A Gas Grill

The "formal" barbecue and grilling season is nearly upon us, and it recently occurred to me that I've never covered how gas grillers can add smoke to their cooking. Given that a lot of my recipes involve smoking, it's long past time for me to help y'all get your smoke on.

Just because you only own a gas grill doesn't mean that smoking is beyond you. While it's true that a gas grill will never give you that true barbecue flavor that you get from charcoal and/or wood, with a little effort you can get fairly close. Here I'll share several ways to take your gas grill to the next level.

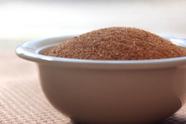
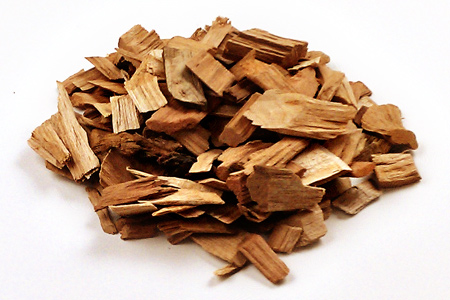
First we need to address wood. In a future post I'll cover what woods go best with what foods, but for now you just need to know that chips are your friend. Various kinds of wood chips are readily available throughout the spring and summer months at your local mega-mart or home improvement center. I recommend that you keep a bag of hickory and one fruit wood (apple or cherry) on hand pretty much year-round. Mesquite chips are also great to have on-hand for steaks and other beef cuts.

When using wood chips it's very important that you soak them for a couple of hours before you plan to start cooking. Often it's hard to remember to soak the chips in advance, but they really do need to be soaked for at least an hour. Otherwise you get a very quick burst of smoke that doesn't do much. You want the chips to smolder and, you guessed it, smoke rather than catch fire and burn up quickly.

Next, we need a container that will do three things:
  1. Restrict the air flow (so the chips don't catch fire and burn up)
  2. Contain the ash
  3. Allow you to move the chips so that they don't burn too quickly
There are many ways to handle this. You can go store-bought, or you can go DIY. I prefer the latter.

Here's a smoker box. These are usually made of anything from cast iron (shown here) to cheap metal. If you're going to go this route, spend a little more and go with cast iron or stainless steel.

How To: Smoke On A Gas Grill

You simply fill it with soaked chips and set it on the edge of one burner. As with any of these methods it will take some experimentation to find the best location on your grill.

Next, we go MacGuyver with a couple homemade smoker boxes made from simple cans. Be careful not to use cans that are lined, like those used for tomatoes. These usually have a white interior.

Here we have a version where you cut the top off of a can, punch holes in the other end, and set it in a larger can. You dump the chips in the smaller can, put the larger can on top, flip it over, then set it on your grate.

How To: Smoke On A Gas Grill

Here's a little different twist on the previous can configuration. If you have one of those can openers that cuts the bead around the can, just rinse it out, put the top back on, and punch a few holes in the lid with a bottle opener. Fill the can with soaked chips, put the lid on, and away you go.

How To: Smoke On A Gas Grill

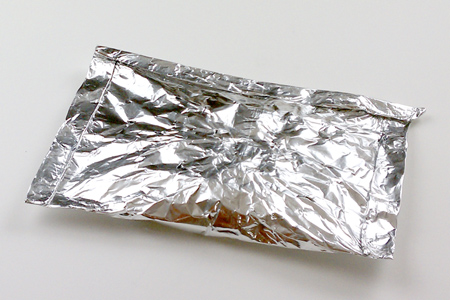
Last, but not least, we have the infamous foil pouch. The instructions to make one of these is usually printed on the wood chip bag, but here goes. It's a really easy one-use option.

Tear off a two pieces of foil about a foot long (one piece if it's heavy-duty). Put one to two cups of soaked chips on one side as shown.

How To: Smoke On A Gas Grill

Fold one half over the other and double-fold each open end to create a sealed packet.

Punch eight to ten holes in the top of the packet using a knife, skewer, or whatever else is lying around that is sharp.

How To: Smoke On A Gas Grill

Lay the packet on top of the flavor bars/burner shield/rocks under the cooking grate (and above the burner). Place it in a corner or far off to one side and not directly under where the food will be.

The great thing about the packet method is that you can easily make various sizes depending on how much smoke you need, and for how long.

Tip: If you are cooking a large cut and need to smoke for a longer time, make an extra packet or two in advance so that you can just put a new one in as needed.

Well, there you have it! Just because you have a gas grill doesn't mean that you have to forego the smokey goodness that is barbecue. With a little added effort and experimentation you will add a whole new dimension to your gas grilling.

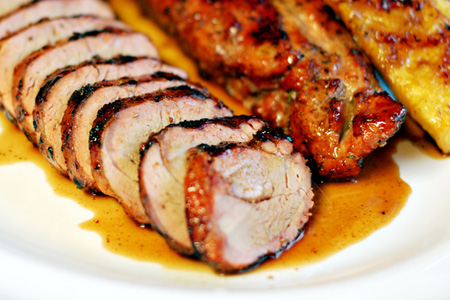
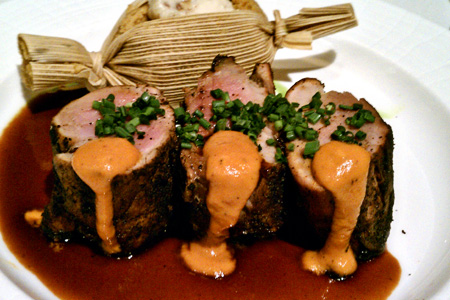
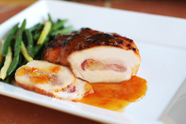
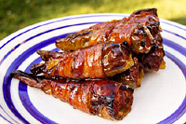
I should mention that these methods are also handy on a charcoal grill when all you have is wood chips, or where you just need a blast or whisper of smoke, as I recently did with some pork tenderloins.

Note: I apologize for the poor picture quality. My wife took the SLR to SoCal, so I was left using my cell camera. Ugh! It's an HTC (Droid) Incredible, in case you're curious.

Labels:


Maple Ancho Glaze

Last weekend I developed this glaze to adorn some beautiful all-natural pork tenderloins that I grilled for dinner. Maple and pork are like peanut butter and chocolate, and the ancho just adds a nice raisin-like chile flavor.

I soaked the tenderloins in Kosmo's Pork Soak for four hours. I then patted them dry with paper towels and gave them a liberal coat of McCormick Grill Mates® Montreal Chicken Seasoning.

I grilled them using what I call the "redneck soo veed" method (reverse-sear). I cooked them indirect to 140º internal (with a whisper of cherry smoke) then seared them direct for just a few minutes per side.

I overcooked the pork by about five degrees, but it was still tender and juicy. Pork tenderloins are so lean that there isn't much margin for error. The added moisture retention from the Kosmo's soak undoubtedly saved me.

The pork was served with oven-roasted tri-color fingerling potatoes and some grilled pineapple wedges that I brushed with the pork glaze. It was a good dinner, indeed.

Ingredients
1 cup Pure maple syrup, grade A amber
1/2 cup orange juice
2 Tbsp Butter
2 Tbsp Bourbon (optional)
1 tsp Ground ancho chile
1 tsp Kosher salt
1/4 tsp Sweet paprika
1/4 tsp Ground ginger
1/4 tsp Ground cayenne
1/8 tsp Smoked paprika
1/8 tsp Cinnamon

Method
Heat the syrup and butter in medium sauce pan over medium heat.

Maple Ancho Glaze

When the butter is melted add the remaining ingredients.

Bring just to a boil then reduce the heat to medium-low and simmer 10 minutes.

Remove from the heat and let cool.

Brush on the carnage of your choice just a minute or two before you take it off the grill.

Enjoy!

Labels: ,


Shepherd's Pie with Porter & Shallot Gravy

For St. Patty's Day this year I decided to make a classic Irish dish, but with a twist — I've added a rich porter and shallot gravy. I like shepherd's pie, but I've always found it to be a little dry and in need of some flavor help.

This gravy adds a deep, rich and complex flavor. The Samuel Smith's Taddy Porter that I used is described this way on their site:
Very dark, fairly full in body and packed with flavor. Intense, dry tangy character of roasted barley.
I haven't had any Taddy in years, but I remembered how bold it is. It was just what I was looking for.

I was almost sure that the rest of family wouldn't care for the gravy, but to my surprise they liked it. My eldest daughter said that it would be good on eggs, but I'm not sure about that. What I do know is that it's really good on this dish.

Let's get a wee bit o' the Irish on!

Ingredients
2 lb Ground beef, lamb, or a mixture of both
6 cups Mashed potatoes, prepared in advance
2 cups Beef broth
2 cups Frozed peas and carrots
1 medium White onion, chopped to 1/4" (about 1 1/2 cups)
1 clove Garlic, minced (about 1 tsp)
4 Tbsp All-purpose flour
1/4 cup Parsley, chopped fine
2 Tbsp Butter
1 Tbsp Thyme, chopped fine
2 tsp Kosher salt
1 tsp Pepper

Gravy Ingredients
2 cups Porter beer
1 cup Beef broth
1/2 medium Shallot, minced (about 3 Tbsp)
1/4 cup All-purpose flour
3 Tbsp Butter
2 Tbsp Worcestershire sauce
1 Tbsp Light brown sugar
1 tsp Pepper

For the pie

Melt the butter in large sauteuse or saute pan over medium-high heat.

Add the onion and sweat until they are soft and translucent.

Add the peas and carrots to the pan, stir, then remove the mixture to a bowl and set aside.

Preheat your oven to 350º.

Return the pan to the heat, add the meat, and brown (do not drain).

Sprinkle the flour over the meat and stir well to combine.

Add the garlic, broth, herbs, salt and pepper to the pan and mix well.

Bring the mixture to a slight boil and cook until the liquid is reduced by about half.

Add the vegetable mixture to the pan, stir and remove from the heat.

Spread the meat and vegetable mixture evenly in the bottom of a greased large oval or 9" x 13" baking dish.

Spread the mashed potatoes evenly over the meat.

Bake for 30 minutes then remove the pie from the oven and set aside.

For the gravy

Return the pan to the heat at medium-high.

Sweat the shallots until they are translucent, then remove to a bowl and set aside.

Return the pan to the heat and melt the butter.

When the butter is foaming, add the flour and whisk very well to make a roux.

Continue cooking, whisking constantly, until the roux starts to develop a nutty aroma (about two minutes).

Reduce the heat to medium and add the porter and broth.

Continue whisking until the mixture is smooth with no lumps.

Return the shallots to the pan and add the remaining ingredients.

Bring the mixture just to a light boil.

Reduce the heat to medium-low and cook another five minutes.

Remove the gravy to a bowl.

Shepherd's Pie with Porter & Shallot Gravy

Serve the pie with a good amount of the gravy and enjoy!

Labels: , ,


Kingsford® University 2011

In parts one and two I covered all of the barbecue and formal education aspects of the trip. Now we're down to where the rubber meets the road -- literally.

I mentioned in the introduction to the first installment that I'd never been to a NASCAR race. Sure, I've seen several races on TV, and I was even in the pits with a buddy for a small town (really small) stock car race in Iowa back in the early nineties, but I'd never been to a "real" race before. I've heard about how cool it is to see one in person, but I hadn't ever really had the opportunity to see one live.

Man, was I in for a surprise!

In part two I talked about the festive atmosphere in the sea of RV's. All day Saturday we heard the noise of the Nationwide Series race, followed by evening practice runs, but it was all from the parking lot several hundred yards away. Being so far away, and never actually seeing the track, you can't really imagine the enormity of the whole thing. It was basically background noise with several helicopters and small aircraft with advertising streamers behind them endlessly circling the track.

We boarded the bus at about 7:30 AM to head to the track. At first I was thinking, "Do we really need to leave that early?!", but the answer soon became very obvious. I mentioned earlier that there were about 180,000 people in attendance at the race. Well, apparently most of them weren't already there, despite the view of the parking lot the day before.

The traffic was a mess, and I think it took us more than an hour to get there. The good news was that Marcus Wang, Kingsford senior scientist, sat next to me and we had a great conversation. The guy knows his charcoal!

We arrived at the track and immediately went to the Kingsford suite. It's on the fourth floor just past the start/finish line. It's a very nice place from which to watch all of the festivities.

Kingsford® University 2011

After hanging out in the suite for a little while we got to meet the driver of the number 47 Kingsford car, Bobby Labonte.

Kingsford® University 2011

ESPN analyst Mike Golic also hung out with us for a while before the race. Seeing him next to Bobby really shows the stature contrast between NFL players and NASCAR drivers. Just for reference, Mike is 6' 5".

Kingsford® University 2011

Next we got to go to the Neon Garage to see the teams prepping for the race. This is often referred to as "NASCAR Disneyland", and I can see why. You are right there in their garage area. You can see the everything from their tools to the car inspections up close and personal.

We even had access to pit road, despite the fact that the security person that we asked said we didn't. Several others from our group made it out there, and my friend Meathead was kind enough to let me use his picture.

Kingsford® University 2011

Photo courtesy of Meathead, AmazingRibs.com


The race started while I was in the peaceful relative quiet of the suite.

Kingsford® University 2011

While it immediately became significantly louder at the green flag, I still had no idea how loud it really is. Then I ventured out on the roof next to the spotters.

Kingsford® University 2011

It became immediately obvious why they gave us earplugs on the bus. Wow! More than forty cars running 9000+ RPM makes a lot of noise!

They served us a nice lunch as we just relaxed, hung out, and enjoyed the rest of the race.

I really enjoyed listening to the communication between Bobby, his crew chief and their spotter via headset throughout the race. Since there are no mirrors in the car, the drivers rely on spotters to verbally tell them what's going on around them. That blew my mind. Imagine the worst high-speed and high-traffic freeway driving that you've ever experienced. Now imagine that same driving with blinders on, your head duct-taped to the headrest, and your passenger yelling what's going on around you. It's pretty amazing, and those boys have this thing down to a science, as you'd expect.

In the late laps of the race we hit the bus and headed back to the hotel to avoid the massive traffic.

I must say that the NASCAR experience is something that will stick with me for a long time. Seeing it on television doesn't even come close to the sensory blast that you get in person. It was great!

A bunch of us decided to round out our weekend by going to dinner at Bobby Flay's Mesa Grill inside Caesar's Palace. We're grill people, so it was a pretty natural choice. We caught the monorail at the MGM and off we went.

Kingsford® University 2011

The atmosphere was pretty cool, and very "Flay-esque". It was upscale but still comfortable. The servers were friendly, but the service was a little slow. I don't know how long we waited for our meals, but it felt like nearly an hour. For a party of six on a Sunday night it seemed slow. However, we had great conversation, so the time was well spent.

I had the New Mexican spice rubbed pork tenderloin with bourbon and ancho chile sauce, and a sweet potato tamale with crushed pecan butter. It looked great on the plate and the pork was perfectly cooked. The sauces were also very nice.

Kingsford® University 2011

The problem for me was the price. Yes, it's a celebrity restaurant, but what you see above was $36. That was way over the top for three pieces of pork and a small tamale. It was good, but not that good.

After dinner we all wandered our separate ways back to the hotel and that ended our wonderful trip to Kingsford University. It was a serious blast, and I'm very glad to have had the opportunity to hang out with a bunch of great foodies.

My sincere thanks to the folks at Kingsford, Current, and everyone else that made it such a great event!

Read more:
Part one
Part two

Labels:


Kingsford® University 2011

I'm continuing where I left off in part one. In this installment I'll cover the rest of day two, which included a bunch of demonstrations and food.

Next on the agenda was a demonstration of beef cuts from Alan Turner, Executive Chef for Snake River Farms.

As I mentioned in the previous post, Snake River Farms produces American Wagyu beef, which is arguably the best beef in America. They use highly-sustainable methodologies and their cattle are raised from the finest stock in the best environment. In short, they do old-school beef.

Kingsford® University 2011

Photo courtesy of Meathead, AmazingRibs.com


Just look at the marbling in this stuff, it's insane!

Kingsford® University 2011

Photo courtesy of Meathead, AmazingRibs.com


Lunch started with a "Cook Once, Eat Twice" demonstration from Chris Lilly. The idea is to find creative ways to use leftovers from a barbecue cook. For this demo Chris showed us a great loaf pan chicken recipe. It's a whole chicken that is slathered with a mixture of 3/4 cup applesauce and three tablespoons Worcestershire sauce. It's then coated with a rub and cooked in a loaf pan indirect (breast-side up) for about two hours.

You then eat the chicken straight off the cooker and use the leftovers in a salad, or in our case, in chicken soft tacos with grilled veggies.

For sides, we were served a great Coal-fired Pico de Gallo, and Pit-Stop Guacamole where the ingredients are straight off the grill. Oh, and Chris' Grilled Sweet and Spicy Pickles were addicting. I think I ate a whole jar.

Next we had a very intersting pork butchery demonstration from Stephen Gerike, Director of Food Service Marketing at the National Pork Board.

Kingsford® University 2011

To say that Stephen knows his hog is an understatement. "Meathead" Goldwyn (of AmazingRibs.com) and I picked his brain about pork for a good thirty minutes leading up to the demonstration. In addition to being a representative of the National Pork Board, he also raises his own heritage breed hogs.

He masterfully broke down an entire half-hog into the various market cuts.

Kingsford® University 2011

The most practical takeaway from this demo is to look for pork that is darker in color. I won't go into the details, but darker reddish pork translates to a more tender and flavorful product. It may be "The Other White Meat", but pale pork is not your friend.

Kingsford® University 2011

Our 'Cued Cocktail Hour was kicked off with a presentation from Dan Gardner, of Four Roses Bourbon. Four Roses is making a huge resurgence with their return to their distillery roots dating back to 1888.

Next, Josh Perry, mixologist at Picán Restaurant in Oakland, California demonstrated what goes into a great cocktail. One process that was intriguing is called "fat washing". This basically entails mixing meat fat into a liquor, chilling it to solidify the fat, then skimming the fat off and filtering the liquor. He used this process to create some bacon-infused bourbon for the event.

Marcus Wang, senior scientist with Kingsford demonstrated a great grilled lemonade. It consists of lemons that are halved, dipped in sugar then grilled for just a few minutes.

Kingsford® University 2011

Photo courtesy of Meathead, AmazingRibs.com


In the mean time, a simple syrup made with a mixture of sugar, honey and a few sprigs of rosemary is heated on the grill.

The lemons are then squeezed into a pitcher and the juice is diluted to taste with water, then sweetened with the syrup. He then added a little bourbon to kick things up a notch or two.

After cocktail hour we were served a "light snack" of chicken wings, ribs and sausage. Later we were served an outstanding dinner of the brisket that had been cooking all day, twice-baked potatoes, and grilled ratatouille.

As with any big event there are unsung heros that just do their thing behind the scenes.

Kingsford® University 2011

That guy on the right is Ken Hess. He's Chris Lilly's sous chef and the man is an incredible cookin' machine! He's also a very smart, nice, and humble guy. You'd never in a million years guess that he's a CIA-trained chef from Brooklyn. Dude is the real deal, and he worked like a madman for us! I think Chris would agree that Ken is the guy who that makes it all look easy.

In part three I'll recap day three at the NASCAR race and dinner Sunday night.

Read more:
Part one
Part three

Labels:


Kingsford® University 2011

Last weekend I was privileged to attend Kingsford University in fabulous Las Vegas. This was my first time attending, and was it ever a treat! To be able to spend three days as a guest of Kingsford in the company of a legendary champion barbecue cook and other barbecue aficionados is a great honor. Oh, and it was also my first time as a NASCAR race spectator.

We stayed in suites at The Signature at MGM Grand, and the rooms were great!

Kingsford® University 2011

My suite overlooked the airport and, as an Air Force veteran, that was a great bonus. Watching planes take off in silence from 36 stories makes them look like model airplanes.

Kingsford® University 2011

We arrived Friday and they held a welcome dinner that evening at the outstanding Craftsteak restaurant inside the MGM Grand. When I say "dinner", I really mean an extravaganza of food and drink. I lost count of how many dishes we were served, but it included some absolutely incredible steaks and side dishes. Unfortunately, I left the good camera in my room, and the cell shots were just awful. Sorry.

Saturday morning we were up bright and early to head to the Las Vegas Motor Speedway for a full day of demonstrations, barbecue, food, and camaraderie.

The venue was set-up in the parking lot amid a vast sea of huge RVs and every kind of tailgating rig you can imagine. I heard that there were 180,000 spectators for the race and, based on what I saw in the parking lot, I think every one of them brought an RV.

Kingsford® University 2011

We were right in the thick of the NASCAR tailgating scene. It reminded me of some of my previous barbecue competitions. It was warm, sunny, dusty, smoky, festive, and fun.

Kingsford® University 2011

Our barbecue professor was none other than 10-time world champion pitmaster, Chris Lilly of Big Bob Gibson's Bar-B-Q in Decatur, Alabama.

In addition to competition barbecue and running things at the restaurants he also authored Big Bob Gibson's BBQ Book in 2009.

If you want to learn from a true professional and gentleman, Chris is your man.

Kingsford® University 2011

Chris kicked off the day by giving us a tour of the pit that he was using for the weekend.

This totally custom pit from Pitmaker in Houston is off-the-chain! This beast features an offset cooker, vertical smoker vault, huge grill, side burner, storage, and a work surface.

Kingsford® University 2011

Photo courtesy of Meathead, AmazingRibs.com


Oh, and yes, that is indeed a motorized flat screen TV. You don't want to miss the race or the game while you're cooking, right?

Kingsford® University 2011

The craftsmanship, fit and finish, attention to detail, and wow factor of this pit are truly outstanding. You can think of it as the Bentley of pits.

Kingsford® University 2011

Pitmakers Victor Howard (left) and George Shore are a couple of nuts that were a blast to hang out with. There's no chance of losing these guys in a crowd.

Kingsford® University 2011

Next Chris gave us a brisket prep demonstration and discussed the process that makes a championship product.

His approach is very simple, which I really appreciate. One tip that I've used which works really well is to liberally coat the brisket with a paste of beef base and beef broth before putting the rub on. The paste helps the rub adhere, and it also helps create a great bark and au jus.

Kingsford® University 2011

He was using American Wagyu briskets from Snake River Farms. These are all the rage on the competition circuit, and for good reason. The quality is incredible.

Kingsford® University 2011

In part two I cover the rest of day two, which included many more great demos and a ton of food.

Read more:
Part two
Part three

Labels:


Kingsford® University

Tomorrow I'll be winging my way to Las Vegas to join a bunch of fellow barbecue and grilling folks at Kingsford University.

This promises to be a serious blast of outdoor cooking, ala NASCAR. I plan to shoot a ton of pics, and even some video. Suffice it to say that I'll have a bunch of fun stuff to share when I get back.

Labels:


Cheesy Garlic Bread

Who doesn't like great garlic bread? Yeah, pretty much nobody with normal taste buds. This recipe is packs a few extra ingredients (OK maybe a lot) that bring some new flavor dimensions to what can otherwise be mundane.

This bread is as comfortable alongside a nice grilled steak as it is with a plate of pasta, or even just a salad. You can even grill it (after it bakes) for a little more rustic flavor.

The recipe makes much more than you will need for a loaf of bread, but it keeps well, and it can be used for all manner of other things. For example, you could drop a tablespoon on top of a steak just off the grill, or melt it on top of some nice roast chicken. Shoot, you could even use it to make some killer butter garlic noodles, or homemade croutons. You're feelin' me, right?

Ingredients
1 Par-baked (take-n-bake) 12 oz French baguette
1/2 cup Parmesan cheese, grated
8 oz Whipped butter
1 Tbsp Olive oil, extra virgin
1 Tbsp Honey
1 Tbsp Garlic, minced
1 Tbsp Dried parsley
2 tsp McCormick Grill Mates® Montreal Chicken Seasoning
1 tsp Balsamic vinegar
Dash Ground cayenne

Preheat your oven to 400º.

Put three or four tablespoons of the butter in a small sauce pan over medium heat.

When the butter is melted, add the oil, garlic, parsley, Montreal Chicken seasoning, and cayenne to the pan.

Cook the mixture for about three minutes, stirring frequently.

Remove the pan from the heat, add the honey and vinegar, and mix well.

Combine the rest of the butter and the pan ingredients in a small mixing bowl.

Add the cheese to the bowl, mix well, cover and refrigerate.

Slice off about half an inch of the baguette, lengthwise.

Smear the cut side of the baguette well with the butter mixture.

Bake the baguette per the package instructions (typically 6-8 minutes).

Turn the oven to broil for a couple of minutes to brown the top nicely.

Caution: Watch it very closely, as it can burn very quickly.

Remove the bread from the oven.

Slice, serve, and enjoy!

Labels: ,

<< Older Posts

Newer Posts >>


Popular Recipes
All-Purpose BBQ Seasoning Braised Nectarines with Champagne Honey Caramel Classic BBQ Chicken Drumsticks Cuban Rueben Grilled Chicken Cordon Bleu Homemade Hot Sauce Hungarian Braised Short Ribs The M.O.A.B. Pulled Pork Pockets Rattlesnake Tails Slammin' Salmon Sweet-n-Sassy BBQ Almonds View all of my recipes
 
Other Popular Posts
Competition BBQ 101 Review: Original vs Competition Kingsford® Charcoal Review: Kingsford® Competition Briquetes Discovery: Kiwi Knives Discovery: Quality Inexpensive Injector Book Review: Serious Barbecue