Click to view a larger image
Here is a fruit platter that I quite literally threw together in about 20 minutes for a church event a couple weeks ago. I paid something like $20 for a bunch of fruit that would have probably cost at least twice that if I would have bought it pre-prepped. Moral of the story: buy whole fruit, prep it yourself and pocket the extra jingle. As an added bonus, you get to practice your knife skills.

Of course, when you include fruit that is prone to oxidation (turning brown) like bananas, apples, etc., you need to toss them in a little citric acid before plating to prevent the dreaded brown nasties.

I absolutely love roasted garlic. It always amazes me how roasting completely mellows and sweetens what is otherwise so harsh and pungent. Given that, and my proclivity to try to find a way to cook most anything over coals, it's really not a surprise that I dreamed this up.

Garlic and bacon is one of those magical pairings like peanut butter and chocolate. Pork fat and garlic are also made for each other. So how can this not be a good thing, right? The pork fat renders into the garlic as it roasts and the subtle smokiness adds another dimension of flavor.

As always, click an image to see the larger version.

Ingredients
3 heads Garlic
2 slices Bacon, sliced thick
3 tsp of your favorite BBQ seasoning

Method

Click to view a larger image
Use medium-large heads of fresh garlic. How do you know if garlic is fresh? Click the picture and it will be obvious. You want good tight white skin, firm cloves, and no gray or black spots.


Click to view a larger image
Slice about 1/2-inch of the bottom (root end) of the head off and discard. Be very careful as it will take some effort to cut. You also want to be sure to leave the cloves as intact as possible. If some pop out, just put them back as best you can.


Click to view a larger image
For each head make a snake about a foot long out of rolled heavy-duty foil. I use wide 18" foil, torn about a foot long. Form the snake around the uncut end of the head. This foil "nest" will hold the heads upright and act as insulation.


Click to view a larger image
Sprinkle 1/2 teaspoon of the seasoning on the cut end of each head. Cut each slice of bacon into thirds and put two of the one third slices on each head. Sprinkle the bacon on each head with another 1/2 teaspoon of seasoning.


Click to view a larger image
Start your fire and prepare for indirect cooking at medium-high heat. Put the nested heads on the indirect portion of your grill/smoker and cook for 1 1/2 hours at about 300º. Remove the garlic from the cooker, mince the bacon, squeeze out the cloves and mash the bacon and garlic into a paste. Refrigerate in a well-sealed container.

You now have some very unique and delicious garlic, but what can you do with it? Well, just use it in just about anything where you'd use standard roasted garlic.

Last night I mixed the whole three head batch, some hot sauce and some of my rub into a 16 ounce tub of sour cream. It made a great dip. Today I used some of the dip to make some killer guacamole. The same dip would be great in mashed potatoes. Be creative and enjoy the bacony garlicky goodness.

Labels: ,


Captain Tracy Moore of Minneapolis Fire Station 5 took grand prize in the fifth national Tabasco Cook & Ladder Competition. Her Mount Tabasco Chocolate Lava Cake (using Tabasco Habanero Sauce) topped a macaroni & cheese and a meatloaf dish to take the grand prize.

This is an annual competition where firefighters from across the nation submit their original recipes that feature one of the six Tabasco pepper sauce products. Ten finalists are selected to participate in the finals which are held in New York City. The top three entries receive a prize of $10000, $5000, and $2000, respectively. The winners must share half of their prize money with their firehouse.

Anyone who can use habanero Tabasco in a dessert and beat two serious all-American comfort foods gets huge props from me. Congratulations!

[via wcco.com]

Competition BBQ 101
In the first installment of this series I covered the essential gear that you'll need for a competition.

In this post I'll provide a basic high-level overview of what to expect at a typical KCBS competition. There are other competition sanctioning bodies, but so far I have only cooked KCBS events, so that's all I know.

First and foremost, you need to know the KCBS rules very well before you arrive. You don't want to learn them the hard way via a disqualification. If you're not familiar with the rules, I suggest that you read them now. The rest of the information below will make much more sense if you understand the rules.

The typical competition will be held at a large public venue such as a park, fairground, etc. The amount of space you'll have varies and depends on your needs. There will be a standard site size (usually 20' x 20') included in your entry, but you can usually purchase larger sites and even RV spots. Work with the event organizer as soon as possible (especially if you want to bring your RV) to ensure that you'll get the space you need. Electricity is sometimes at a premium, so ask about it early if you'll need it.

As I mentioned in the last post, weather can be, and often is, a huge factor at competitions. You'll want to make absolutely sure that you keep an eye on the forecast and prepare accordingly. Even so, be prepared for what you think might be the worst case scenario.

Standard KCBS competitions are two day events and are most often Friday and Saturday. I would strongly advise against driving a long distance to an event on the same day that it starts. You want to arrive rested and ready for a long weekend. If you show up drained, it's all uphill from there.

OK, on to the timeline. Again, this is a very basic overview. The intent is to simply give you an overall understanding of the flow of a standard competition. Each event has variations, but this is very typical. Ask the organizer for a timeline prior to the event.

Note: This timeline does not take into account optional categories (sauce, dessert, "anything but", sausage, etc.) that are often available at a competition.

Day One


  • Arrive at the venue and get to your assigned cook site.

  • Unload, set-up your cook site and meet/greet the other teams.

  • Eat lunch and socialize with the other teams.

  • Cook site and meat inspection.

  • Cook's meeting -- this is the time to ask any and all questions.

  • Receive your turn-in boxes.

  • Start your meat preparation (trimming, seasoning, etc.)

  • Eat dinner and socialize with the other teams.

  • Start your long cooks (brisket and pork).

  • Pre-build (garnish) your turn-in boxes (optional, but highly recommended).

  • More socializing with other teams (drunkenness not advised).

  • Quiet hours start.

  • Sleep! You'll need all you can get.

Note: You'll obviously need to monitor your long cooks throughout the night.

Day Two


  • Wake up early!

  • Check your long cooks (brisket and pork).

  • Start your medium cook (ribs).

  • Eat breakfast.

  • Start your short cook (chicken).

  • Clean up, rest, and prepare for turn-ins.

  • Turn-ins! They are thirty minutes apart with a 10-minute window.

    • 11:55 - 12:05: Chicken
    • 12:25 - 12:35: Ribs
    • 12:55 - 1:05: Pork
    • 1:25 - 1:35: Brisket

  • Catch your breath and relax a little.

  • Clean up and start packing prior to the awards ceremony.

  • Awards! This is what it's all about.

  • Get your score sheets.

  • Finish cleaning and packing.

  • Say farewell to the other teams.

  • Leave.

Well, there you have it. If it looks like a lot of work and a lot of fun, you're right. At about halfway through your first set of turn-ins you'll be wondering why you ever wanted to do this. However, on the way home (or maybe the next day) you'll be thinking about your next competition. You'll probably be hooked.

Tips:
  • I cannot overemphasize the importance of practice. Try at least one practice cook under mock competition conditions.
  • Develop your own cooking timeline for each category. Start at the turn-in time and work backward.
  • I highly recommend that you take lots and lots of notes. Keep track of what worked well, what didn't, and what to do differently next time.
  • Analyze your score sheets and your notes closely while the competition is still fresh in your mind. Write more specific notes for next time.
  • Update your gear checklist as you pack. Note any unnecessary items or things you forgot.
  • You will be very tired after a competition. Don't plan to drive a long distance home. You'll be barely functional the next day.

Other installments:
The Gear
Tips For Success
Q & A With a First-Time Competitor

Labels: ,


BBQ Central
I want to tell you about an outstanding barbeque and grilling internet "radio" show. It's brought to you by Greg Rempe, who runs the popular BBQ Central forum. Greg is based in Cleveland, Ohio and he has the only weekly show that appeals to the full range of live-fire cooking aficionados. No matter if you are a weekend backyard warrior or a seasoned competition cook, you will find something of interest in his shows.

What I really like about Greg's show is that he prestents great guests and information in a fun and down-to-earth style. For example, he recently had on Eric Schuetzler, senior scientist for Kingsford product and process development to discuss the creation, making and marketing of the new Competition Briquets. This interview is typical of the high-caliber guests that frequent Greg's show. Suffice it to say that dude gets some heavy-hitters.

If you've never heard it, I highly recommend that you peruse the podcast archives and hear what you've been missing. Tune in each Tuesday and hear the show live at 9PM EST on LA Talk Radio Channel 1 and thank me later.

Labels: , ,


Click to view a larger image
About a year and a half ago I stumbled upon a method that will turn the average ho-hum steak into something that you'd gladly overpay for at a restaurant. OK, almost gladly.

The concept is simple. You give the meat a massive dose of salt for a short period of time, rinse, pat very dry, then broil or grill it like you normally would. The salt causes the protein strands to break down while simultaneously seasoning the meat completely. Each bite is tender and perfectly seasoned. Sounds good, no? That's what I thought.

Here's how I do it. Put the steaks in a baking dish and completely cover both sides with kosher or sea salt (no table salt). When I say "cover", I mean almost to the point where you can't see the red of the meat. Cover the dish with plastic wrap, or even just a paper towel and let the meat marinate at room temperature for 10 minutes per 1/4" of thickness.

Note: I would not recommend this for steaks less than about 3/4" thick.

When the marinating time is up, rinse the steaks very well with cold water. Don't worry, the salt has served its country very well and is no longer needed. Pat the steaks dry with paper towels. You want them as completely dry as possible. Now, we have plenty of saltiness, but we need to bring some pepper to the party. I give both sides of my steaks a good dose of fresh medium-grind black pepper (see the picture -- click for a larger version).

My friend, you are now ready to put the heat to the meat. Just grill, broil or otherwise cook the steaks as you normally would. I think you'll agree that this can elevate a pedestrian steak far beyond what you'd expect. And it's quick, too!

Tip: If you like a little more flavor than just basic salt and pepper, sprinkle some of your favorite BBQ seasoning, seasoned salt, or even just garlic salt onto the steaks before you add the salt blanket.

Afterthought: Something I'd like to try is adding a little Worcestershire sauce after the salt and then spreading it around, mixing it with the salt to form a paste.

[via steamykitchen.com]

Click to view a larger image
This past weekend I ran across Jack Daniel's "Whiskey Barrel Charcoal Briquets & Smoker Blocks" at my local Sportsman's Warehouse store. Being a lover of the standard JD barrel chips, I simply had to buy the last two bags on the shelf.

The bags are only 6.5 pounds, and I paid $6.99 per bag. However, the product is really two-in-one. It contains briquettes that are impregnated with tiny barrel chips, along with 1½" solid barrel wood chunks (cut from the staves). Since the barrels are made of white oak, it works really well as an addition to your normal smoke wood. I use the chips like the wood version of black pepper -- just a heavy sprinkle on top to finish.

I've never seen this product before, and I think it might be discontinued. I scoured the internet and could not find any trace of it. Also, there isn't any real discernible whiskey smell in the bag; i.e. it's probably old. In fact, there's even a note to this effect printed on the bag.

In any event, I will try it, and I'm almost certain I will like it. Why do I say that? Because, as I mentioned, I love their chips, and I'll probably never be able to find it again. Ain't that the way it almost always works?

Afterthought: Can I ask a seemingly stupid question? Why in the world doesn't one of the major charcoal brands (like, oh I don't know, that one that starts with a 'K') partner with a whiskey maker and offer these impregnated briquettes on a large scale? Maybe there aren't enough barrels to go around, but it would be nice.

Update - 02/14/09
Tonight I used a mix of this JD charcoal with some of the new Kingsford Competition Briquets (probably about an 20/80 mix, respectively) to cook some chicken and the flavor was amazing. I've never been a real fan of oak for smoke, but the combination is outstanding for chicken.

Update - 03/15/09
Last night I used these briquets mixed with some Kingsford standard and Competition (about 50% / 20% / 30%, respectively) for my Pomegranate Chile Lime-glazed pork tenderloin. This combination of coals worked very well.

Labels:

All-Purpose BBQ Seasoning

This is for those of you who need or want a great basic all-around barbeque seasoning (or "rub"). This is also a great base recipe for creating your own signature seasoning.

This recipe is very close to what I use in competition cooking. I've left out a few (very few) "secret ingredients" so that I can maintain a competitive edge. Take it and make it your own.

When I say that this is "all-purpose", I mean it. This rub works well on every kind of meat, and even vegetables or popcorn.

It's key to remember that any seasoning is only as good as its ingredients. Quality fresh ingredients are what separates a great rub from the pack. Buy the best you can find and you will be amazed at the difference. For outstanding spices I strongly recommend World Spice Merchants.

Ingredients
1 c Sea salt, medium fine (no table salt, please)
1/2 c Unrefined evaporated cane sugar (no table sugar, please)
1/2 c Dark brown sugar, dried (instructions below)
2 Tbs Sweet Hungarian paprika (the real deal, please)
2 Tbs Chili powder (Spice Islands is a good store-bought brand)
2 Tbs Granulated onion (not onion "powder")
2 Tbs Dry mustard (I prefer Colman's)
1 Tbs Granulated garlic (not garlic "powder")
2 tsp Black pepper, ground fresh (I use a separate coffee grinder for spices)
2 tsp Celery salt
2 tsp Ground ginger
1 tsp Ground cayenne

Method
Preheat your oven to 170°.

Pour the sea salt and dark brown sugar on a large sheet pan, mix well, and spread the mixture evenly over the entire pan.

Bake the salt/sugar mixture 60 minutes, or until the sugar is very dry.

Notes: Drying the sugar prevents clumping and ensures an even distribution in the final product. Drying it with the salt helps prevent the sugar from becoming a solid sheet. It's happened to me, and it's bad. That's how I developed this method.

Combine the remaining ingredients in a large mixing bowl.

When the sugar is dry, remove the pan from the oven and let cool. Once cool, grind the mixture well in the pan by rolling it with a rolling pin. Do this several times in alternating directions.

Sift the salt/sugar mixture into the mixing bowl. I use a fine mesh strainer and a pestle to break it up further. Toss out any rock-like clumps.

Mix all the ingredients very well (I use a large whisk) and store in an airtight container.

Labels:


Click to view a larger image
Last weekend I finally got my hands on a bag of the new Kingsford Competition Briquets. As a quick aside, am I alone in thinking it should be "briquettes"? I must be right because even Wikipedia agrees with me.

In short, I was really impressed. I used them to cook a hot & fast brisket for a church Super Bowl party. As I originally suspected, they smelled very "Rancher-esque". They burned very evenly with minimal ash. In fact, after a six-hour 350º cook I had nearly half of the 12-pound bag left in my cooker.

I realize that these are a little pricey, but I really like them so far. One cook is by no means a good test, but I'll keep putting them through their paces.

The venerable Greg Rempe of TheBBQCentral.com and BBQ Central radio fame had Eric Schuetzler, senior scientist for Kingsford product and process development, on his show tonight. It was a great interview that yielded a ton of interesting information. Good on ya, Greg!

Labels: ,


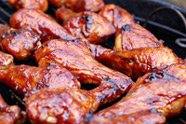
Here is the process I used to cook a "hot & fast" barbequed beef brisket. Brisket is generally more than a little initimidating for those that have never cooked one. I know that was the case for me back in the day.

For those uninitiated, the brisket is a very tough cut found on the chest of the animal, between and behind the front legs (foreshank). Cattle walk a lot, so the front legs get a good workout. After one look at a brisket you will see that it looks like a cow's odometer. It's long and hard, like the third grade.

Tough "lesser cuts" are generally what barbeque is all about. A tough cut usually equates to a tough (long and slow) cook, but that need not be the case. This brisket was my first attempt at cooking hot and fast. The results have me scratching my head wondering why I've been torturing myself with 16-hour cooks (low & slow means about 1 - 1 ½ hours per pound).

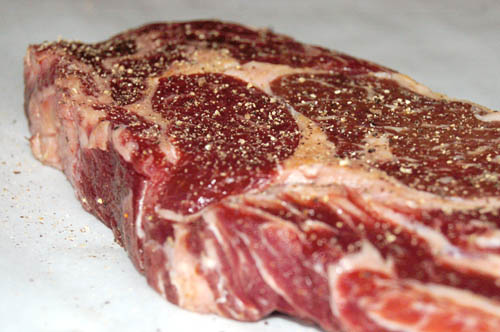
When shopping for a brisket, you want a "whole packer". This is really two cuts in one. The pointy thicker end is called the "point" (or "deckle") and the long flat portion is called, you guessed it, the "flat".

Look for a packer in the 13-16 pound range with a flat that is fairly consistent in thickness, and with a nice white fat cap. The white fat indicates that the animal was finished on grain instead of grass. You should also check to make sure that it's flexible. As a general rule, the more flexible it is in the bag, the more tender it will be in the end. I drape mine over my forearm and look for a nice bend.

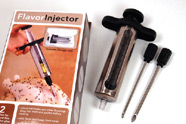
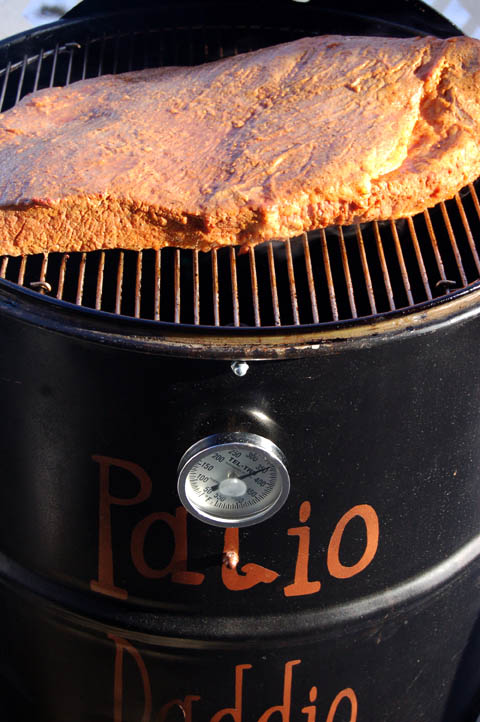
For a little different twist, you can marinate the brisket in a double batch of Patio Daddio Bovine Bath then drain and use the slather and seasoning process in step 5 below.

As always, click the image to see a larger version.

Ingredients
1 whole Packer brisket (13-16 lbs)
1/4 cup Prepared mustard (I use French's)
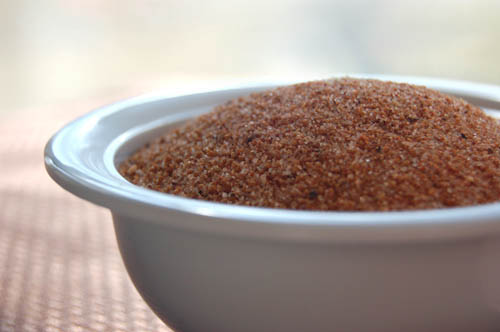
2/3 cup of your favorite BBQ seasoning

Method

Hot & Fast BBQ Beef Brisket

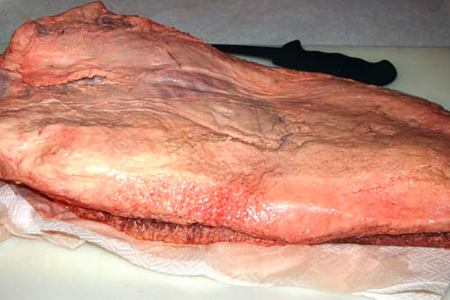
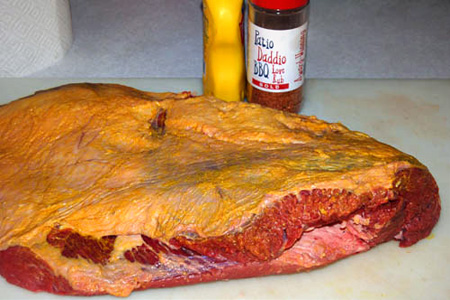
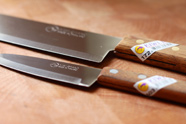
Remove the brisket from the cryovac bag, rinse well with cold water and pat dry. Put it on the cutting board fat-side-up on a double layer of paper towels. This brisket was 15 ½ pounds in the bag. I like to use a 6-inch flexible boning knife for trimming. You'll see why as we progress through the process.

Hot & Fast BBQ Beef Brisket

The first order of business in trimming is to shave the fat layer down to a reasonable thickness. Seasoning and smoke can't penetrate fat. However, it will act as an insulation layer to protect the meat when we cook it. I try to get it to about ¼-inch, but you can see it's an inexact science.

Hot & Fast BBQ Beef Brisket

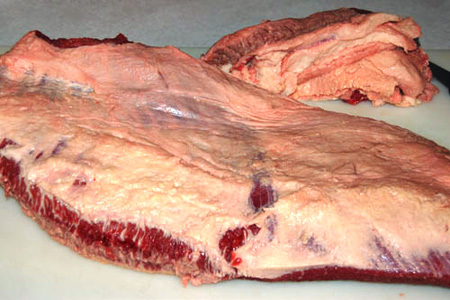
Flip the brisket over and you'll notice two pockets or "kernels" of hard fat. These separate the flat and point muscles. Fat equals flavor and tenderness, but we don't need it all. Cut about ¾ of the fat out of the smaller kernel where you see the knife point.

Hot & Fast BBQ Beef Brisket

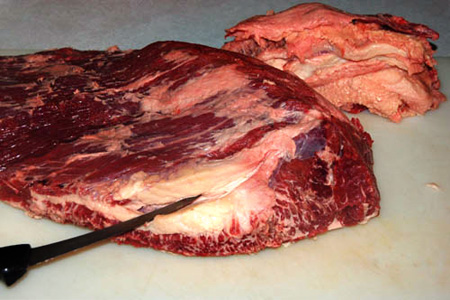
Turn the brisket around and repeat the same trimming process for the large kernel. I like to make a long horizontal cut through the fat then make two long deep angular cuts from each outside edge toward the first cut. You can see this where the knife is pointing. I was a little over-aggressive in my trimming.

Hot & Fast BBQ Beef Brisket

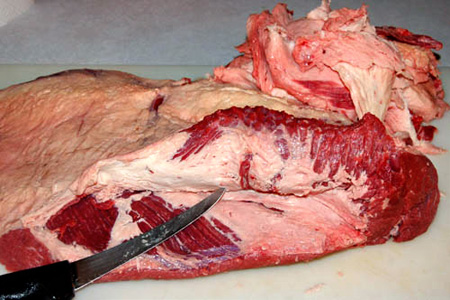
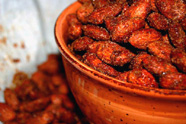
You can see from the pile of trimmings in the background of the picture above that I removed about 1 ½ pounds. In my experience, that's pretty typical. Now we need to smear a thin layer of mustard on all of the outer surfaces (edges too) and inside each fat kernel pocket. This will help the seasoning adhere.

Hot & Fast BBQ Beef Brisket

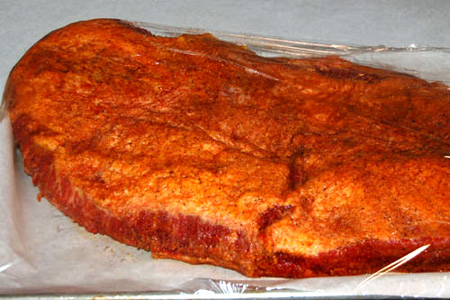
Season the entire surface and fat kernel pockets liberally with your seasoning. You don't need to rub it into the meat, but I pat it when I'm done to make sure it all sticks. Put the brisket on parchment paper in a large a sheet pan, cover with plastic wrap, and refrigerate overnight, or at least several hours.
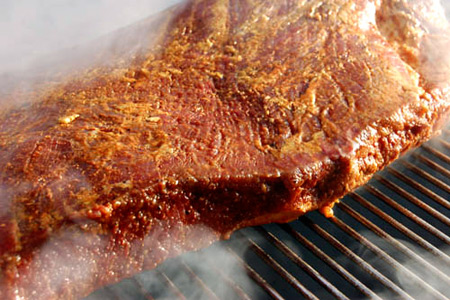
Hot & Fast BBQ Beef Brisket

Start your fire and prepare for indirect cooking at medium-high heat. I recommend a mixture of cherry and hickory chunks or chips for smoke. Cook fat-side-down at 325-350º until the thickest part of the flat reaches 190º. Mine (about 14 pounds trimmed) took 5 hours at an average of 350º.

Hot & Fast BBQ Beef Brisket

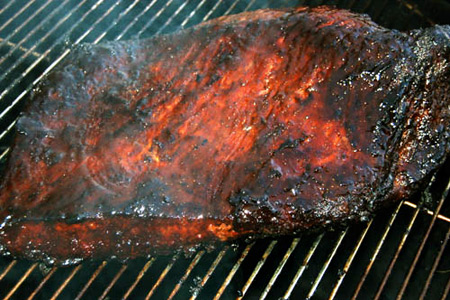
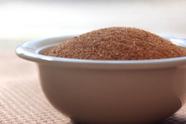
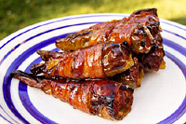
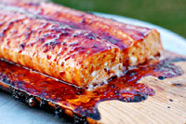
At 190º we're ready to apply the finishing glaze. I use a mixture of ½ cup golden brown sugar, ½ cup beef broth, ¼ cup ketchup, 1 Tbsp Worcestershire, and 1 tsp black pepper. Spoon and spread this (with the back of the spoon) on all sides and dust with the BBQ seasoning. Cook 30 more minutes and repeat.

Hot & Fast BBQ Beef Brisket

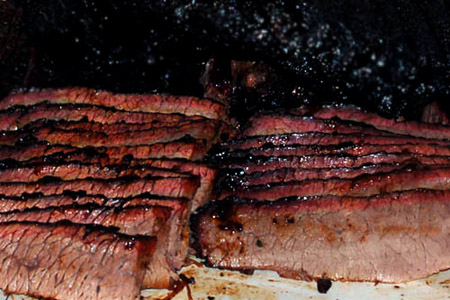
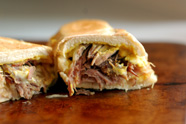
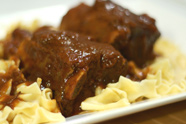
Continue cooking until the thickest part of the flat reaches 200º. Remove from the cooker, wrap in a double layer of heavy-duty foil and let rest 30 minutes (or longer wrapped in towels). Unwrap, separate the flat and point (it's easy), slice across the grain about ¼" thick, serve and enjoy.

Notes:
The entire cook took exactly 6 hours in my homemade drum cooker (UDS), but your mileage may (and almost certainly will) vary.
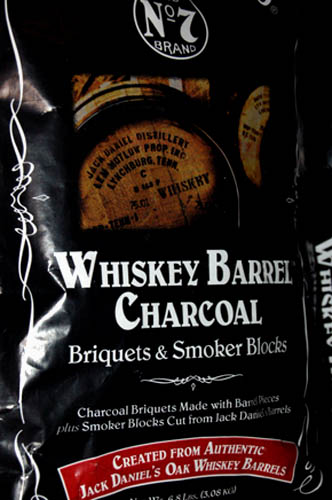
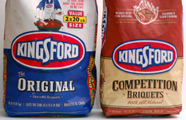
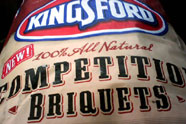
I used the new Kingsford Competition Briquets for this cook. It's the first time that I've had a chance to use them.

Labels: ,

Just when you think you've seen enough barbecue abominations, along come "Vegan BBQ Ribs". Now, I am the first to appreciate the creative use of ingredients, but this is just plain over the top. Knead?!

What do you serve with these? Maybe some baked soy fries and a nice bean sprout and wheat grass slaw?

What will our hemp-clad friends think of next?

[via eatdrinkbetter.com] Better? I'd hate to see worse.

<< Older Posts

Newer Posts >>


Popular Recipes
All-Purpose BBQ Seasoning Braised Nectarines with Champagne Honey Caramel Classic BBQ Chicken Drumsticks Cuban Rueben Grilled Chicken Cordon Bleu Homemade Hot Sauce Hungarian Braised Short Ribs The M.O.A.B. Pulled Pork Pockets Rattlesnake Tails Slammin' Salmon Sweet-n-Sassy BBQ Almonds View all of my recipes
 
Other Popular Posts
Competition BBQ 101 Review: Original vs Competition Kingsford® Charcoal Review: Kingsford® Competition Briquetes Discovery: Kiwi Knives Discovery: Quality Inexpensive Injector Book Review: Serious Barbecue