Last year Kingsford® changed the formulation of their Original "blue bag" charcoal, and I posted
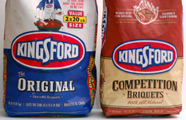
of the two formulations. That review was very well-received, so now it's time to do a briq-to-briq comparison of the Original versus their Competition product.
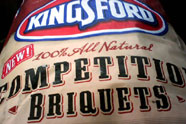
The Competition briquets are a relatively new product that was released in early 2009. Here's how it's described on
their site:
This charcoal combines the performance needed for competition level results with the convenience needed for backyard barbecue. You get the best of both worlds — the high heat associated with lump charcoal plus the unique briquet shape that provides the consistent burn you need for perfect results every time.
3 main advantages:- High heat
- 100% all-natural
- Ready to cook on fast
Essentially, you can think of the Competition product as lump charcoal in briquet form. You get the high heat of lump with the convenience, uniformity, and predictability of a briquet.
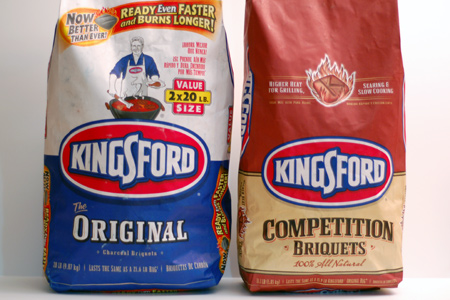
As in the previous review, I wanted this comparison to be as fair and impartial as I could make it. I don't have a laboratory, but I am an engineer, so I did the best that I could in a home setting. I ran side-by-side tests of two brand new off-the-shelf bags of the each product. As you will see, I've weighed and photographed each product so that you can see exactly what I saw.
Let's see how all of this went down.
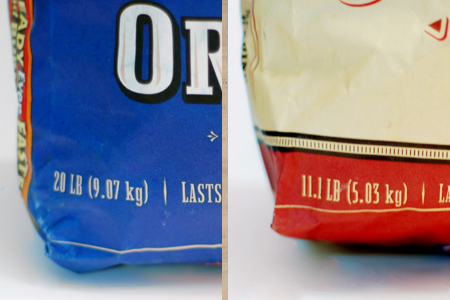
The pictures above show an Original bag that may be somewhat misleading. A standard blue bag weighs 16.6 pounds, but what's pictured is a larger 20-pound bag from a two-pack.
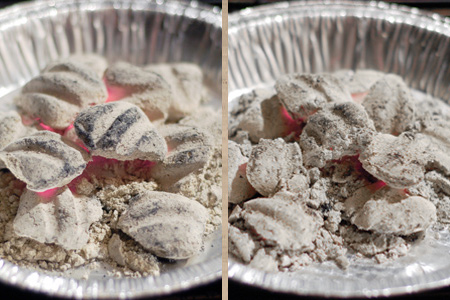
Note: From here on the Original briquets are pictured on the left, and the Competition on the right.
The appearance of the briquets from each product are all but identical, so much so that I had to make a concerted effort to keep from getting confused about which was which.
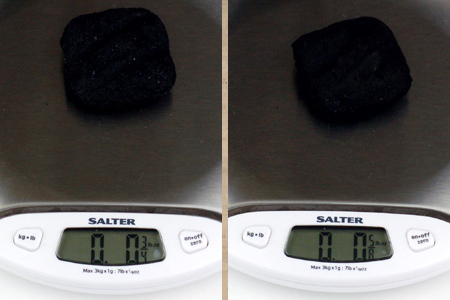
I weighed various quantities of the Original and the Competition briquets and here is how they compared:
| Quantity | Original | Competition |
|---|
| 1 briquet | 3/4 oz | 5/8 oz |
| 5 briquets | 4 1/4 oz | 3 1/8 oz |
| 10 briquets | 8 5/8 oz | 6 1/4 oz |
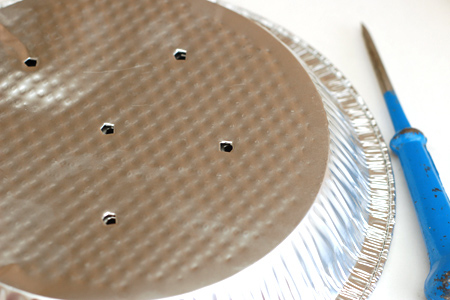
For the burn test, I punched two aluminum pie pans with an identical pattern of holes. I wanted to use a method that would contain the ash for a final weight, as you will see later.
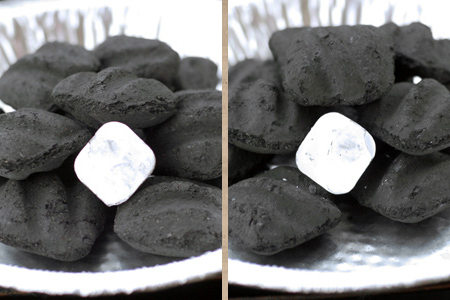
I arranged the Original and Competition briquets in each pan as similarly as I could. I used 12 briquets in each, in layers of six, four, and two (all with the grooves facing upward). I put a single Weber wax starter cube in each pile.

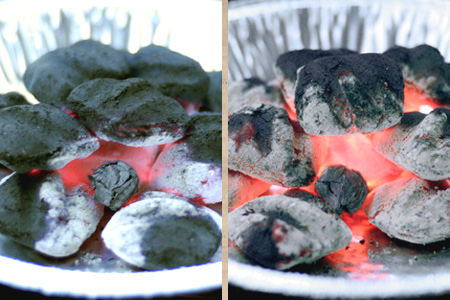
I lit each cube and took pictures at five-minute intervals. For those interested, the temperature when I started the burn was 38º and the humidity was 82%.
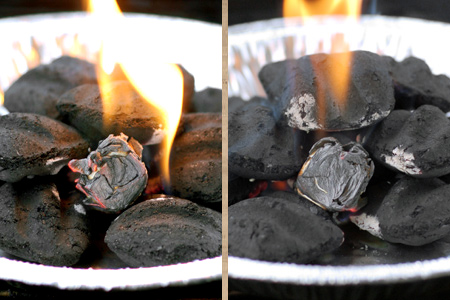
At five minutes.
At 10 minutes.
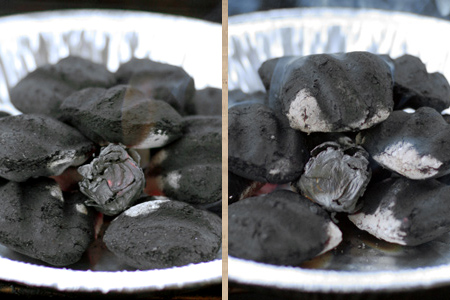
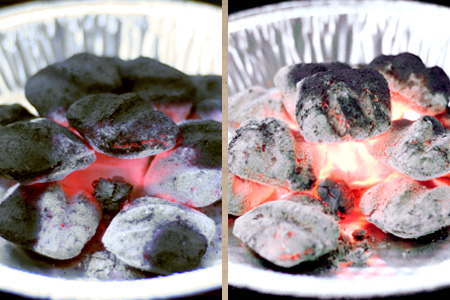
At 15 minutes.
At 20 minutes.
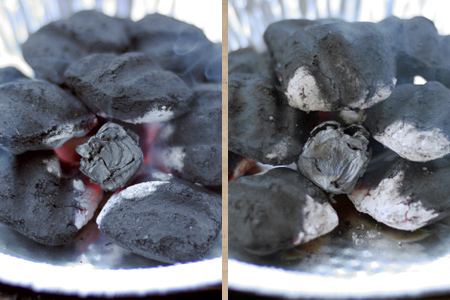
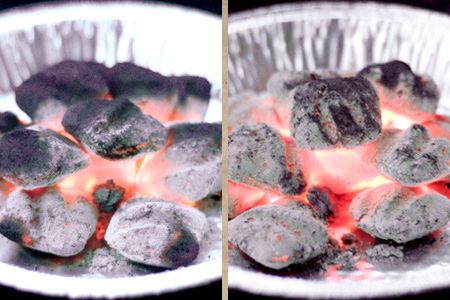
At 25 minutes. I started taking temperature measurements at this point. I used an infrared thermometer on the side of each pan at the 5 o'clock position. I would have liked to have had more readings, but the Competition sample was burning so hot that it exceeded the 600º limit of my infrared thermometer.
| Original | Competition |
|---|
| 323º | 464º |
At 30 minutes.
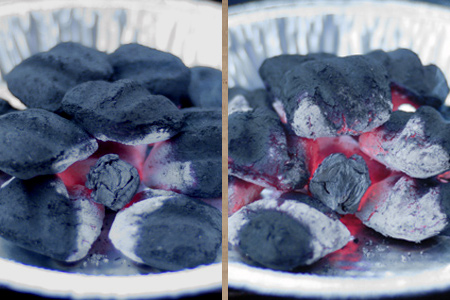
At 35 minutes.
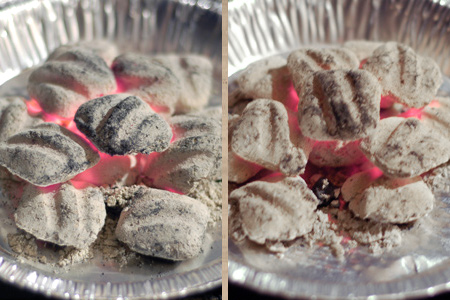
At 60 minutes.
| Original | Competition |
|---|
| 384º | 452º |
At 90 minutes.
| Original | Competition |
|---|
| 330º | 248º |
I stopped taking pictures at 90 minutes, but I continued reading the temperatures out to 180 minutes.
| Minutes | Original | Competition |
|---|
| 120 | 254º | 185º |
| 180 | 182º | 129º |
Here is a chart that shows the Original and Competition temperatures over time. The horizontal axis is time and the vertical shows the temperatures.
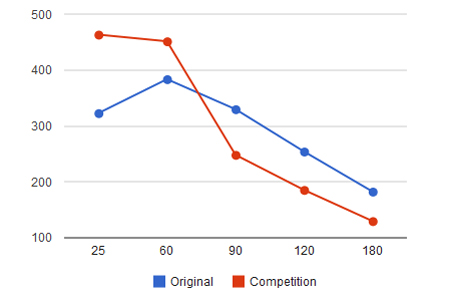 Note:
Note: As I mentioned earlier, the Competition sample was burning so hot that it exceeded the 600º limit of my infrared thermometer. Given that, this graph doesn't really depict all of the true temperature profile.
What about ash? As you can see below, the Competition briquets produce nearly half the ash by weight, which is a significant difference. However, as you can also see, the undisturbed volume of ash is the same. I'm not sure that really matters, but I found it interesting.
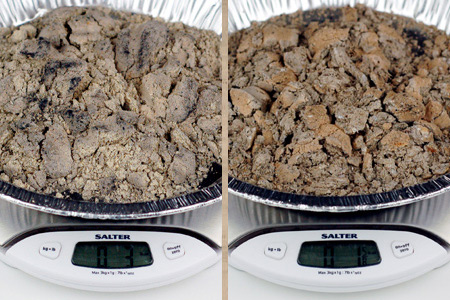
| Quantity | Original | Competition |
|---|
| 3 oz | 1 5/8 oz |
In the end, the results of this comparison show exactly what I have experienced firsthand over the past two years. I regularly use both the blue bag and the Competition, and I appreciate what each offers. For low-n-slow barbecue, I primarily use the Original for its long consistent heat. For grilling and higher heat cooks I use the Competition product. It gives my grilled food just the right blast of wood fire flavor. At barbecue competitions I mix them (about 70% blue to 30% Competition) to give me the best of both worlds.
Here are some questions that I posed to the folks at Kingsford, and their answers.
Me: It's been two years since the Competition briquets were introduced. How have they fared commercially?
Kingsford: When we initially launched Kingsford Competition Briquets, we couldn’t keep bags on the shelves! The briquets continue to sell well, especially at places such as Costco, which we attribute to the unique combination of high heat associated with lump charcoal and the consistent burn associated with briquets that allow backyard grillers to barbecue like the experts.
Me: Is it fair to say that the composition of the Competition briquets is pure charwood with a natural binder?
Kingsford: Yes, Competition briquets are 100% natural. They are made up of wood char with just enough natural binder to hold it together.
Me: Does the Competition product use the same charwood as the blue bag product? If not, how is it different?
Kingsford: Yes, our Competition briquets use the same wood char that we use in Kingsford Original.
Me: How do the burning and temperature characteristics of the Competition product differ from that of the blue bag product?
Kingsford: Competition briquets burn hotter than Kingsford Original briquets. They also reach cooking temperature faster than Kingsford Original.
Me: Does the Competition product produce less ash than the blue bag briquets?
Kingsford: Yes.
Me: I noticed that the Charwood product has been discontinued. Will the Competition product remain widely available for the foreseeable future?
Kingsford: Currently there are no plans to discontinue Kingsford Competition Briquets. That said, our research and development team is constantly thinking about how to improve our product line up, so we cannot rule out a line change completely, but we don’t have any immediate plans to do so.
Me: Are there any plans to offer a line of smokewood-impregnated Competition products like you have with the mesquite and hickory lines?
Kingsford: That’s a great idea! At the moment, we don’t have a product like that in development but we are always thinking about ways to improve upon our product. Keep the feedback and ideas coming! We’d love to hear ideas on
our Facebook page.
I hope that you've found this to be informational and helpful.
Obligatory Disclaimer: This is not a paid endorsement. It's just my honest findings and opinions.